Docker镜像有没有内核?
从镜像大小上即可看出,Docker镜像是没有内核的,一个内核的大小远大于精简版镜像,镜像本身只提供rootfs,即系统启动后,用户空间里使用的文件系统,如/dev,/bin,/etc等目录,所以容器里没有/boot目录,/boot目录里保存的是与内核相关的文件与目录。
 root@docker1 ~]#./docker-in.sh 61f0542dc08
root@61f0542dc08d:/# uname -r
4.15.0-29-generic
root@61f0542dc08d:/# ls
bin  boot  dev  etc  home  lib  lib64  media  mnt  opt  proc  root  run  sbin  srv  sys  tmp  usr  var
root@61f0542dc08d:/# ls -a /boot    空目录
...
没有内核是因为当容器启动和运行时,直接使用宿主机内核,其没有直接与系统硬件打交道,所以也就不需要内部有内核和硬件驱动。宿主机上跑的带内核的系统是虚拟机。
镜像打造
两种方法:手动打造 OR 自动打造(基于Dockerfile)
手动制作yum版nginx镜像:
Docker制作类似于虚拟机镜像的制作,按照公司的实际业务需求,将需要安装的软件、相关配置文件等基础环境配置完成,打成镜像。最后在批量从镜像生成批量生产实例,大大简化了相同环境的重复部署工作。
初始化系统:
基于本地docker仓库有centos镜像,然后进行打造镜像
# docker run -d -it --name centos-yum centos /bin/bash
[root@fc244bec114b /]# yum install wget -y
[root@fc244bec114b /]# cd /etc/yum.repo.d/
[root@fc244bec114b yum.repos.d]# rm -rf ./*     #更换yum源为阿里云
[root@fc244bec114b yum.repos.d]# wget -O CentOS-Base.repo http://mirrors.aliyun.com/repo/Centos-7.repo
[root@fc244bec114b yum.repos.d]# wget -O epel.repo http://mirrors.aliyun.com/repo/epel-7.repo
yum安装并配置nginx:
[root@fc244bec114b /]# yum install nginx -y

安装常用命令:
#yum install vim pcre pcre-devel zlib \
zlib-devel openssl openssl-devel iproute net-tools iotop -y

修改nginx配置文件
# vim /etc/nginx/nginx.conf     #修改或添加如下:
user nginx;
worker_processes auto;
error_log /var/log/nginx/error.log;
pid /run/nginx.pid;
daemon off;     禁止后台运行

自定义web页面
# vim /usr/share/nginx/html/index.html
<h1>Welcome to my web site!!!</h1>
提交为镜像:
在宿主机基于容器 ID 提交为镜像;可带TAG号,可以更好的区分公司业务。
#docker commit -m "nginx image" -a "martinhe 384430592@qq.com" "fc244bec114b" centos-nginx:v1

此项仅供参考,因上述容器内已经修改dameon off,使用如下命令打造的镜像,启动容器时报错:
nginx: [emerg] "daemon" directive is duplicate in /etc/nginx/nginx.conf:9
#docker commit -m "nginx image" -a "martinhe 384430592@qq.com" -c 'CMD ["/usr/sbin/nginx","-g","daemon off;"]'  "fc244bec114b" centos-nginx:v2

Usage:  docker commit [OPTIONS] CONTAINER [REPOSITORY[:TAG]]
Options:
  -a, --author string    Author (e.g., "John Hannibal Smith <hannibal@a-team.com>")
  -c, --change list      Apply Dockerfile instruction to the created image
  -m, --message string   Commit message
  -p, --pause            Pause container during commit (default true)
从打造的镜像起一个名为yum-nginx-centos的容器
#docker run -d -p 80:80 --name yum-nginx-centos centos-nginx:v1 /usr/sbin/nginx

访问测试:
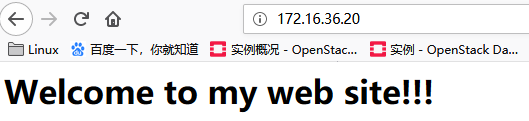
DockerFile制作yum安装nginx版镜像
DockerFile可以说是一种可以被 Docker 程序解释的脚本, DockerFile是由一条条的命令组成的,每条命令对应 linux下面的一条命令, Docker程序将这些命令放到容器内去执行。Docker 程序读取 DockerFile 并根据指令生成 Docker镜像。有了Dockerfile后,可以更加方便的打造镜像,通过修改Dockerfile内的命令,即可打造不同业务需求的镜像。避免枯燥无味的手动打造镜像。具体如下:
初始化系统:
基于本地docker仓库有centos镜像,然后进行打造镜像
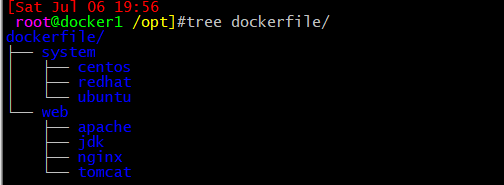
创建目录环境:
# cd /opt
# mkdir dockerfile/{web/{nginx,tomcat,jdk,apache},system/{centos,ubuntu,redhat}} -pv    #可根据业务需求后续创建不同的文件夹。
进入nginx目录:
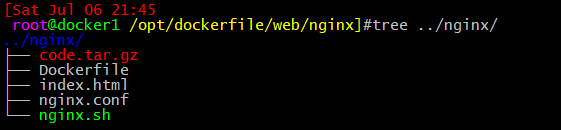
# cd /opt/dockerfile/web/nginx
编写 Dockerfile
# vim Dockerfile
# Martinhe Dockerfile
# Base centos Create nginx-image
FROM centos[:latest] #除注释外,第一行定义基础镜像,本地镜像名,若不存在从官网拉取
MAINTAINER Martin.he 384430592@qq.com #定义镜像维护者信息
#USER nginx:nginx
#WORKDIR /a
#WORKDIR b 指定工作目录,最终工作目录为/a/b
#VOLUME ["/dir_1","/dir_2"..] #设定宿主机目录对应容器内目录。
#ENV CATALINA_HOME /usr/local/tomcat #设定环境变量,可拷贝脚本到容器内指定目录
#ENV PATH ${CATALINA_HOME}/bin:$PATH
# 安装常用命令
RUN yum install wget -y && cd /etc/yum.repos.d/ && rm -rf ./* && wget -O CentOS-Base.repo http://mirrors.aliyun.com/repo/Centos-7.repo && wget -O
epel.repo http://mirrors.aliyun.com/repo/epel-7.repo && yum install nginx vim pcre pcre-devel zlib zlib-devel openssl openssl-devel iproute net-to
ols iotop -y
# 部署网站或应用源码包,ADD命令拷贝到设定目录内自动解压
ADD code.tar.gz /usr/share/nginx/html/
# copy本地脚本到根目录
#COPY nginx.sh /
#COPY nginx.conf /etc/nginx/
# 通常使用daemon off。进行容器卡位。即容器内PID为1的应用为nginx
#CMD ["/usr/sbin/nginx","-g","daemon off;"]
CMD /usr/sbin/nginx -g "daemon off;"
#CMD /nginx.sh
#如果要拷贝脚本到目录内执行,在本地提前赋予执行权限:
#vim nginx.sh
#!/bin/bash
/usr/sbin/nginx
tail -f /etc/hosts
#chmod +x nginx.sh
执行镜像构建:
可清晰看到每个执行步骤:
[Sat Jul 06 21:36
 root@docker1 /opt/dockerfile/web/nginx]#docker build -t martinhe/nginx:v5 .
Sending build context to Docker daemon  8.704kB
Step 1/5 : FROM centos
 ---> 9f38484d220f
Step 2/5 : MAINTAINER Martin.he 384430592@qq.com
 ---> Using cache
 ---> 5fb8e2538ace
Step 3/5 : RUN yum install wget -y && cd /etc/yum.repos.d/ && rm -rf ./* && wget -O CentOS-Base.repo http://mirrors.aliyun.com/repo/Centos-7.repo && wget -O epel.repo http://mirrors.aliyun.com/repo/epel-7.repo && yum install nginx vim pcre pcre-devel zlib zlib-devel openssl openssl-devel iproute net-tools iotop -y
 ---> Using cache
 ---> 2f605d407fcf
Step 4/5 : ADD code.tar.gz /usr/share/nginx/html/
 ---> Using cache
 ---> 3875c709a39e
Step 5/5 : CMD /usr/sbin/nginx -g "daemon off;"
 ---> Running in b745a9660fbc
Removing intermediate container b745a9660fbc
 ---> 881d2a4d347f
Successfully built 881d2a4d347f
Successfully tagged martinhe/nginx:v5
查看是否生成本地镜像:

从镜像启动容器:
#docker run -d -it -p 80:80 martinhe/nginx:v6
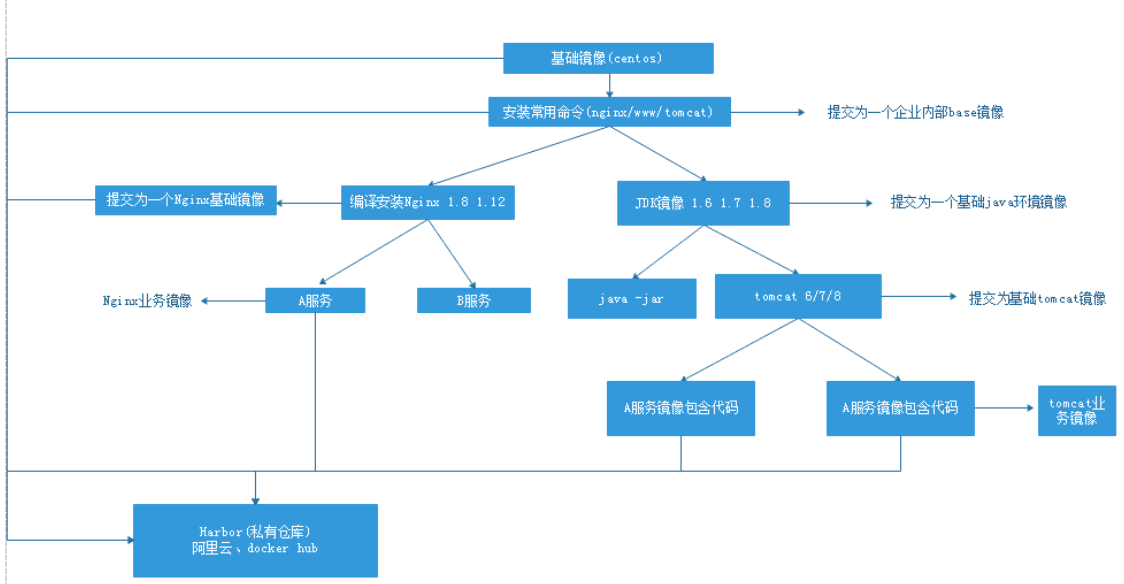
规划镜像制作方案:
制作镜像时,可基于基础镜像制作相关服务基础镜像,而后再制作代码发布镜像,如下图:
预先准备相关文件夹:
# mkdir /opt/dockerfile/{system,web/{nginx/mknginx,jdk/8u192,haproxy,tomcat/{tomcat-app1,tomcat-app2},apache} -pv
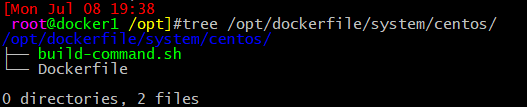
制作centos基础镜像:
安装系统常用命令和应用程序。
Dockfile文件内容:
# Martinhe Dockerfile
# Base centos-7.6.1810 and yum some frequently used command and packages
FROM centos:7.6.1810
MAINTAINER Martin.he 384430592@qq.com
RUN yum install wget -y && cd /etc/yum.repos.d/ && mkdir backup && cp Cent* backup && wget -O CentOS-Base.repo http://mirrors.aliyun.com/repo/Centos-7.repo && wget -O epel.repo http://mirrors.aliyun.com/repo/epel-7.repo && yum install  vim iotop bc gcc gcc-c++ glibc glibc-devel pcre pcre-devel openssl  openssl-devel zip unzip zlib-devel  net-tools lrzsz tree ntpdate telnet lsof tcpdump wget libevent libevent-devel bc  systemd-devel bash-completion traceroute -y
build-command.sh文件内容:
#!/bin/bash
TAG=7.6.1810
docker build -t martinhe/centos:${TAG} .
制作编译安装nginx镜像:
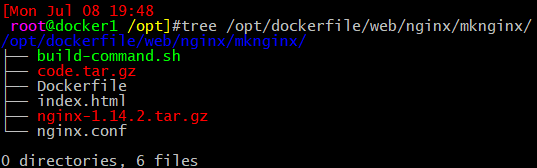
Dockfile文件内容:
# Martinhe Dockerfile
# Base martinhe/centos:7.6.1810 Create nginx-image
FROM martinhe/centos:7.6.1810
MAINTAINER Martin.he 384430592@qq.com
RUN yum install wget -y && cd /etc/yum.repos.d/ && rm -rf ./* && wget -O CentOS-Base.repo http://mirrors.aliyun.com/repo/Centos-7.repo && wget -O epel.repo http://mirrors.aliyun.com/repo/epel-7.repo && yum install vim pcre pcre-devel zlib zlib-devel openssl openssl-devel iproute net-tools iotop -y
RUN yum install gcc gcc-c++ -y
ADD nginx-1.14.2.tar.gz /usr/local/
RUN cd /usr/local/nginx-1.14.2 && ./configure --prefix=/apps/nginx --user=nginx --group=nginx --with-http_ssl_module --with-http_v2_module --with-http_realip_module --with-http_stub_status_module --with-http_gzip_static_module --with-pcre --with-stream --with-stream_ssl_module --with-stream_realip_module && make -j 2 && make install && ln -sv /apps/nginx/sbin/nginx /usr/sbin/nginx
COPY nginx.conf /apps/nginx/conf
RUN mkdir /data/htdocs/ -pv  && groupadd -g 666 nginx && useradd -u 666 -g 666 -r -s /sbin/nologin nginx
ADD code.tar.gz /data/htdocs/
RUN chown nginx.nginx -R /data/htdocs && chown nginx.nginx -R /apps/nginx/
CMD /usr/sbin/nginx
nginx.conf文件内容:
user  nginx nginx;
worker_processes  1;
daemon off;

#error_log  logs/error.log;
#error_log  logs/error.log  notice;
#error_log  logs/error.log  info;

#pid        logs/nginx.pid;


events {
    worker_connections  1024;
}


http {
    include       mime.types;
    default_type  application/octet-stream;

    #log_format  main  '$remote_addr - $remote_user [$time_local] "$request" '
    #                  '$status $body_bytes_sent "$http_referer" '
    #                  '"$http_user_agent" "$http_x_forwarded_for"';

    #access_log  logs/access.log  main;

    sendfile        on;
    #tcp_nopush     on;

    #keepalive_timeout  0;
    keepalive_timeout  65;

    #gzip  on;

    server {
        listen       80;
        server_name  localhost;

        #charset koi8-r;

        #access_log  logs/host.access.log  main;

        location / {
            root   /data/htdocs;
            index  index.html index.htm;
        }

        #error_page  404              /404.html;

        # redirect server error pages to the static page /50x.html
        #
        error_page   500 502 503 504  /50x.html;
        location = /50x.html {
            root   html;
        }

        # proxy the PHP scripts to Apache listening on 127.0.0.1:80
        #
        #location ~ \.php$ {
        #    proxy_pass   http://127.0.0.1;
        #}

        # pass the PHP scripts to FastCGI server listening on 127.0.0.1:9000
        #
        #location ~ \.php$ {
        #    root           html;
        #    fastcgi_pass   127.0.0.1:9000;
        #    fastcgi_index  index.php;
        #    fastcgi_param  SCRIPT_FILENAME  /scripts$fastcgi_script_name;
        #    include        fastcgi_params;
        #}

        # deny access to .htaccess files, if Apache's document root
        # concurs with nginx's one
        #
        #location ~ /\.ht {
        #    deny  all;
        #}
    }


    # another virtual host using mix of IP-, name-, and port-based configuration
    #
    #server {
    #    listen       8000;
    #    listen       somename:8080;
    #    server_name  somename  alias  another.alias;

    #    location / {
    #        root   html;
    #        index  index.html index.htm;
    #    }
    #}


    # HTTPS server
    #
    #server {
    #    listen       443 ssl;
    #    server_name  localhost;

    #    ssl_certificate      cert.pem;
    #    ssl_certificate_key  cert.key;

    #    ssl_session_cache    shared:SSL:1m;
    #    ssl_session_timeout  5m;

    #    ssl_ciphers  HIGH:!aNULL:!MD5;
    #    ssl_prefer_server_ciphers  on;

    #    location / {
    #        root   html;
    #        index  index.html index.htm;
    #    }
    #}

}
index.html和code.tar.gz文件内容:
需要部署的网页文件压缩包
<h1>Welcome to my web make install nginx site!!!</h1>

# tar zcvf code.tar.gz index.html
build-command.sh文件内容:
#!/bin/bash
TAG=1.14.2
docker build -t martinhe/nginx:${TAG} .
制作二进制安装haproxy镜像:
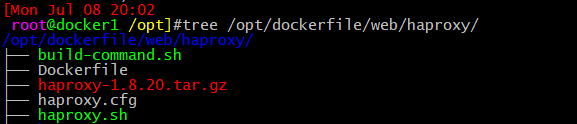
Dockfile文件内容:
# Martinhe Dockerfile
# Base martinhe/centos:7.6.1810 Create haproxy-image
FROM martinhe/centos:7.6.1810
MAINTAINER Martin.he 384430592@qq.com
ADD haproxy-1.8.20.tar.gz /usr/local/src/
RUN cd /usr/local/src/haproxy-1.8.20 && make ARCH=x86_64 TARGET=linux2628 USE_PCRE=1 USE_OPENSSL=1 USE_ZLIB=1 USE_SYSTEMD=1 USE_CPU_AFFINITY=1 PREFIX=/usr/local/haproxy && make install PREFIX=/usr/local/haproxy && ln -s /usr/local/haproxy/sbin/haproxy /usr/sbin/
COPY haproxy.cfg /etc/haproxy/
COPY haproxy.sh /usr/local/haproxy/run/
RUN groupadd -g 777 haproxy && useradd -u 777 -g 777 -r -s /sbin/nologin haproxy
RUN chown haproxy.haproxy -R /usr/local/haproxy
CMD /usr/local/haproxy/run/haproxy.sh
haproxy.cfg文件内容:
global
maxconn 100000
chroot /usr/local/haproxy
#stats socket /var/lib/haproxy/haproxy.sock mode 600 level admin
uid 777
gid 777
daemon
nbproc 1
#cpu-map 1 0
#cpu-map 2 1
#cpu-map 3 2
#cpu-map 4 3
pidfile /usr/local/haproxy/run/haproxy.pid
log 127.0.0.1 local3 info

defaults
option http-keep-alive
option  forwardfor
maxconn 100000
mode http
timeout connect 300000ms
timeout client  300000ms
timeout server  300000ms

listen stats
 mode http
 bind 0.0.0.0:9999
 stats enable
 log global
 stats uri     /haproxy-status
 stats auth    haadmin:q1w2e3r4

listen  web_port
 bind 0.0.0.0:80
 mode http
 log global
 server web1  172.16.36.20:80  check inter 3000 fall 2 rise 5
haproxy.sh文件内容:
用脚本运行haproxy,并在容器中前台打开文件的方式,使容器在后台持续运行不退出
#!/bin/bash
haproxy -f /etc/haproxy/haproxy.cfg
tail -f /etc/hosts
build-command.sh文件内容:
#!/bin/bash
TAG=1.18.20
docker build -t martinhe/haproxy:${TAG} .
制作二进制安装jdk基础镜像:
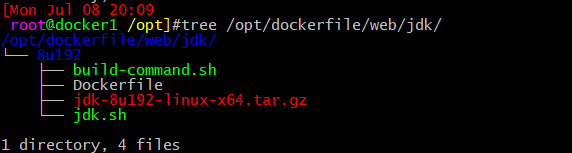
Dockfile文件内容:
# Martinhe Dockerfile
# Base martinhe/centos:7.6.1810 Create jdk-8u192-image
FROM martinhe/centos:7.6.1810
MAINTAINER Martin.he 384430592@qq.com
ADD jdk-8u192-linux-x64.tar.gz /usr/local/
RUN cd /usr/local/ && ln -s jdk1.8.0_192 java
COPY jdk.sh /etc/profile.d/
jdk.sh 文件内容:
配置内部JAVA环境变量
export JAVA_HOME=/usr/local/java/
export JRE_HOME=$JAVA_HOME/jre
export CLASSPATH=.:$CLASSPATH:$JAVA_HOME/lib:$JAVA_HOME/jre/lib:$JAVA_HOME/lib/tools.jar
export PATH=$JAVA_HOME/bin:$PATH
build-command.sh文件内容:
#!/bin/bash
TAG=8u192
docker build -t martinhe/jdk:${TAG} .
制作二进制安装tomcat基础镜像:
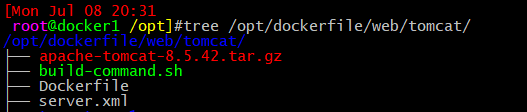

Dockfile文件内容:
# Martinhe Dockerfile
# Base martinhe/centos:7.6.1810 Create jdk-8u192-image
FROM martinhe/jdk:8u192
MAINTAINER Martin.he 384430592@qq.com
ADD apache-tomcat-8.5.42.tar.gz /usr/local/
RUN cd /usr/local/ && ln -s apache-tomcat-8.5.42 tomcat && mkdir /data/webapps/ROOT/{WEN-INF,META-INF,classes,lib} -p && groupadd -g 888 tomcat && useradd -u 888 -g 888 -d /home/tomcat -r tomcat && cp /usr/local/tomcat/conf/server.xml{,.bak}
COPY server.xml /usr/local/tomcat/conf
COPY tomrun.sh /usr/local/tomcat/bin
RUN chown tomcat.tomcat -HR /usr/local/tomcat && chown tomcat.tomcat -R /data/webapps
COPY tomcat.sh /etc/profile.d/
CMD /usr/local/tomcat/bin/tomrun.sh
修改server.xml文件web默认存储目录内容:
<Host name="localhost" appBase="/data/webapps"
unpackWARs="true" autoDeploy="true">
<!-- SingleSignOn valve, share authentication between web applications
Documentation at: /docs/config/valve.html -->
<!--
<Valve className="org.apache.catalina.authenticator.SingleSignOn" />
-->
<!-- Access log processes all example.
Documentation at: /docs/config/valve.html
Note: The pattern used is equivalent to using pattern="common" -->
<Valve className="org.apache.catalina.valves.AccessLogValve" directory="logs"
prefix="localhost_access_log" suffix=".txt"
pattern="%h %l %u %t "%r" %s %b" />
</Host>
tomcat.sh 文件内容:
配置内部tomcat环境变量
export CATALINA_HOME=/usr/local/tomcat
export PATH=$CATALINA_HOME/bin:$PATH
tomrun.sh 文件内容:
#!/bin/bash
su - tomcat -c "/usr/local/tomcat/bin/catalina.sh run"
build-command.sh文件内容:
#!/bin/bash
TAG=8.5.42
docker build -t martinhe/tomcat:${TAG} .
制作二进制安装tomcat-app1镜像:

Dockfile文件内容:
# Martinhe Dockerfile
# Base martinhe/centos:7.6.1810 Create tomcat-webapp1-image
FROM martinhe/tomcat:8.5.42
MAINTAINER Martin.he 384430592@qq.com
ADD code.tar.gz /data/webapps/ROOT
RUN chown tomcat.tomcat /data/webapps -R
index.jsp 文件内容:
<%@ page language="java" contentType="text/html; charset=UTF-8"
    pageEncoding="UTF-8"%>
    <!DOCTYPE html>
<html>
    <head>
                <meta charset="utf-8">
                <title>Web app1</title>
    </head>
    <body>
            后面的内容是服务器端动态生成字符串,最后拼接在一起
            <%
            out.println("hello app1.jsp");
            %>
    </body>
</html>

# tar zcvf code.tar.gz index.jsp
build-command.sh文件内容:
#!/bin/bash
TAG=app1
docker build -t martinhe/tomcat:${TAG} .
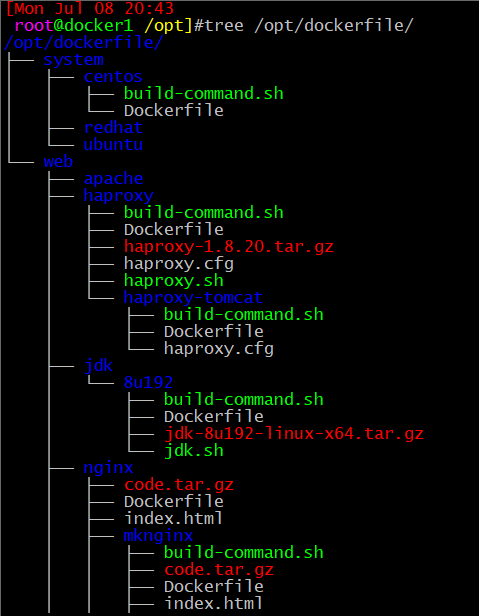
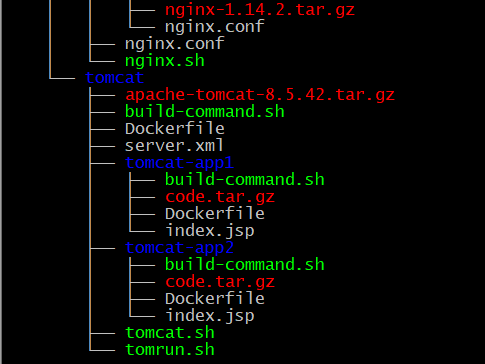
最终的目录结构是这样的: